Summer is the time for perfectly ripe strawberries, crisp zucchini, juicy tomatoes, and fresh herbs. The only downside? This produce is top notch during summer time, but not so much during the chillier months…or is it? How do you get the sweet, full-flavored tastes of summer produce in the dead of winter? By preserving your summer fruits and vegetables! There are many ways to go about preserving summer fruits and vegetables, from freezing to pickling to drying.

Best Practices for Freezing Summer Produce
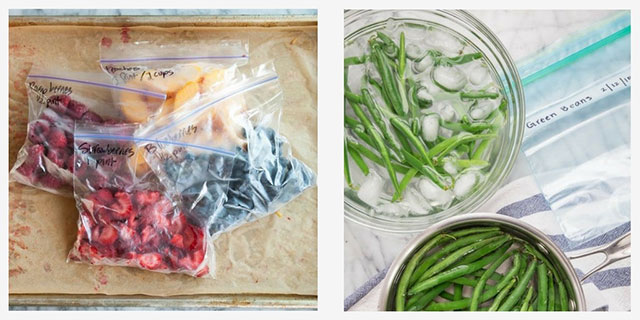
Freezing may be one of the most popular options when it comes to preserving summer fruits and veggies. Fruits such as berries, peaches, pears, or melons can be pitted (if need be), sliced, and placed in freezer bags. Make sure the fruit is perfectly ripe before freezing because you are stopping the growing process.
Methods for Fresh Fruit Freezing
The easiest method of freezing produce is to lay the berries or fruit pieces out on a baking sheet lined with parchment paper and freezing them overnight or until solid before placing in a freezer bag. This way, the fruits freeze individually and are easier to store and use. As with all freezing, make sure to label the bag with the contents and date and seal the bag tightly.

Techniques for Freezing Vegetables
Vegetables are a slightly different story. Some vegetables need to be blanched, or cooked slightly, before freezing. This allows the veggies to keep their color and nutrients and stops enzymes from spoiling the vegetables.
Blanching Means: Briefly cooking vegetables in boiling water then submerging them in ice water immediately after removing from the stove to stop the cooking process.
- Veggies That Need Blanching Prior to Freezing:
- Green Beans, Peas, Broccoli, Asparagus, Corn and Carrots
- Veggies That Can Be Blanched, but Don’t Need To Be:
- Spinach, Swiss chard, and Kale
- Veggies That Don’t Need Blanching Prior to Freezing:
- Tomatoes, Potatoes, Peppers, and Winter Squash

Explore Our Other Blogs
Entertaining & Holidays– Learn how to host perfect dinners and learn about Amish holiday traditions.
In The Kitchen – Explore how to make the most out of your Market’s produce and food with recipes, tips & tricks, helpful guides.
Shopping At The Markets– Find helpful advice for shopping at a farmers market on anything from FAQs on shopping in bulk or secrets to choosing the best produce.
Freezer-Safe Options for Baked Goods
Baked goods such as bread or pies are popular freezer-safe options. Consider turning your summer zucchini into sweet or savory zucchini bread, freezing the bread whole or slicing it into on-the-go pieces. Have a surplus of fruits? Fruit pies such as apple, blueberry, or even a strawberry rhubarb pie can be made easily in a disposable pie tin and wrapped in plastic wrap. Place the pie in a freezer bag, label it and you’re good to go.
Tricks to Freezer-Storing Your Fruits & Veggies
- Remember to freeze flat before placing produce in a labeled bag to allow the items to freeze separately and not stick to each other
- Labeled bags (with contents and date) are the key to an organized freezer space
- Freeze ready to eat items in smaller, perfect portion quantities, this makes defrosting a quicker and easier process
Ideal Method to Canning Summer Produce
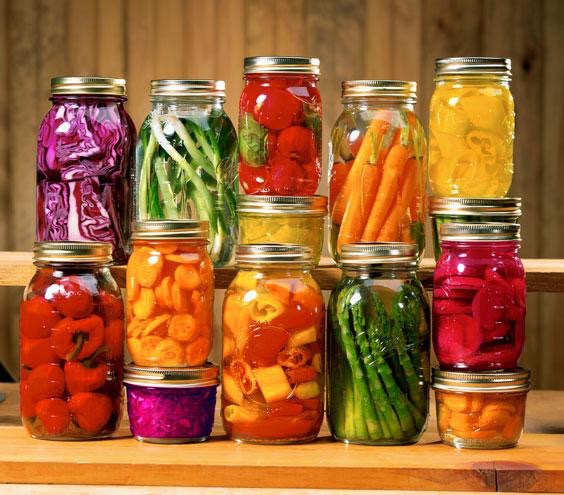
Canning is another popular method of preserving summer fruits and vegetables. While frozen produce should be used within a year, canned items are actually better for the long haul. The canning process can be quite tedious, but it is definitely worth it. It is possible to can precooked or raw produce.

Step-By-Step Canning Basics
- First, you will need sterile, air-tight glass mason jars. Sterilize the jars by filling them with boiling water (then rinsing and drying) or baking them in the oven without lids at 400 degrees for 10 minutes. With either method, make sure they are completely cool before continuing.
- Fill the jars with your desired items; you can make pickles, sauerkraut, jellies or jams, applesauce, tomato sauce, salsa, or even pesto. Fill the jars and pack them tightly but leave one inch of space at the top. With the canning process, expansion is bound to occur.
- Next, put the lid on and seal it tight. The final step in the canning process is a water bath. You will need to place the cans in an extra-large saucepot of boiling water. Add enough water so that it covers the jars by an inch or two.
- Leave the jars in the boiling water with the lid on (water bath canning process time varies based on contents and recipe).
- Turn the heat off and allow the jars to sit in the water for around 5 minutes to bring the temperature down. Then, remove the jars carefully and allow them to sit for 12 to 24 hours.
- Finally, be sure to store the cans in a cool, dark place
Read more about the basics of canning and Amish canning recipes.
Tips While Canning Fresh Vegetables & Fruit
- If you’re not planning on canning your fresh fruits right away, be sure to lay them flat and not piled together. Piling creates bruising and can soften your fruits; making the rotting process speed and/or making it more difficult to peel the skin and prep your fruits.
- Planning on making preserves or pie filling? Regular cornstarch won’t do — what you’ll need is a clear gel.
Hacks to Drying & Dehydrating Summer Produce
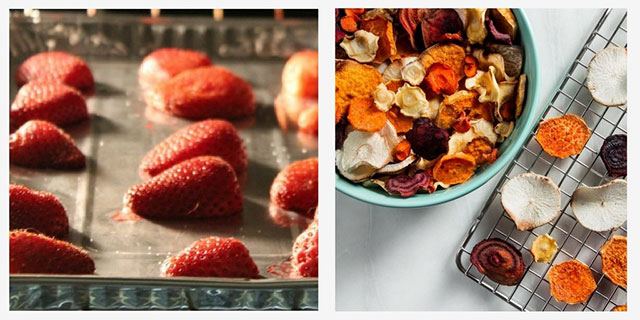
Drying fruits and veggies does not require a dehydrator to be successful. It can be done in the oven, usually at the lowest possible temperature (around 200 degrees).
Classic Routine to Drying Fruit
- Remove any pits and slice the fruit if necessary, lay them flat on a baking sheet, and bake them in a 200-degree oven for approximately 3 hours.
- For an extra challenge, toss several fruits into your blender and pour the blended fruit juice onto a baking sheet. Place it in a 200-degree oven for the same amount of time. Your result? A sweet, homemade, fruit roll-up snack!
Best Way to Dehydrating Vegetables, aka making great veggie chips
- Slice your vegetables very thin, add seasonings, and lay them out evenly on a baking sheet.
- Baking times vary depending on the vegetable and recipe chosen but, compared to fruits, veggie chips cook quickly.
- Veggie chips are baked in a much hotter oven, between 350 and 400 degrees, to obtain that much-desired crunch.

How to Dry Fresh Herbs
- Chop the herbs to the desired size and lay flat on a tray or baking sheet.
- Herbs can be sun-dried outdoors, placed inside for a few days, or baked in a 200-degree oven to speed up the process.
- Finally, like all dried items, store in an airtight container.
- Be sure to label the containers to prevent confusion between herbs.


